
Document 15 - “Trust, training and thoroughness”
The Battle of Messines, 7 June 1917, a historical overview
When the British Expeditionary Force saved the Belgian town of Ypres from the German invaders in 1914 they did so narrowly. They clung on to a bulge (a salient, in military terms) of ground that extended a mere three kilometres up the Menin Road in front of the town. The Germans dug in on the high ground either side and in front of the town. From their vantage point, they could see all that went on behind the British lines and shell it from three sides.
In 1917 their commander-in-chief Field Marshall Douglas Haig developed plans to break out of the salient, capture the Belgian Channel ports and force the Germans out of Belgium. His first step would be to capture the high ground the Germans occupied to the south, an area known as the Messines Ridge that the Germans had occupied since October 1914.
Haig gave the job of capturing the ridge to one of his most capable generals, Herbert Plumer, who approached planning with his three watchwords, "trust, training and thoroughness".
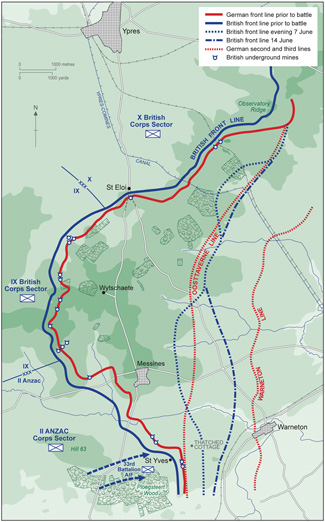
To take the ridge, Plumer had one of the best-equipped and supported forces assembled during the war. Two British corps (IX and X) would assault the centre and left of the ridge, with II ANZAC Corps on the right. There were two strictly limited objectives. In the morning the first wave of troops would capture and consolidate the ridge itself, including the villages of Messines and Wytschaete. After 12 hours to consolidate their gains and bring forward field guns, fresh troops would advance down the eastern slope to capture the German second line, called the "Oosttaverne Line". Supporting the troops would be the tightest concentration of artillery yet mustered: 2,266 guns on a 15-kilometre frontage, about one piece of artillery every six metres.
Plumer's plan also involved secretly tunnelling under the German positions to plant twenty-two huge explosive mines. These would be exploded at 3:10am on 7 June 1917, just before the infantry left their trenches to attack.
The Battle of Messines would prove to be a success for the British. Plumer's Army captured all of its objectives within seven days and caused the Germans some 23,000 casualties. Although 'cheap' for Western Front standards, Messines still cost the British forces 20,940 men. II ANZAC Corps shouldered the heaviest share with 13,900 casualties.
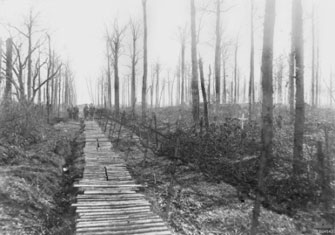
Hun's Walk and German pillbox
British maps referred to this road as Hun's walk. It ran from Messines village down to the main German defensive position, the Oostaverne Line, which was studded with concrete pillboxes like the one in this image.
Messines Ridge from Hill 63
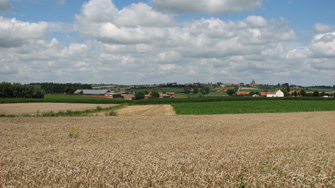
General Plumer and his staff watched the battle from this position. The nearer church steeple marks the location of Messines village, an objective of the New Zealanders during the battle. Further to the left, the steeple of Wytchate church can be seen. This was an objective for British troops.
German pillbox in the Oostaverene Line
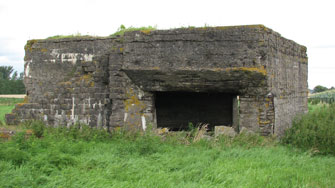
A number of German pillboxes still exist on Messines Ridge. This one was part of the formidable Oostaverne Line, the Australians' final objective for 7 June. Its wide, forward facing aperture suggests it housed a field gun. In June 1917 it would have been covered in soil to camouflage it, and surrounded by trenches and wire.
Messines Village
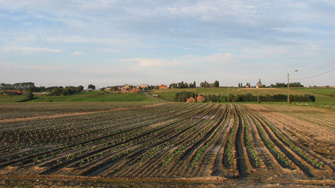
The New Zealanders attacked up these slopes at zero hour on 7 June 1917. The German front line ran along the forward slope, just beneath the top. A German pillbox still remains to the right of the road where it bends sharply, near the crest.
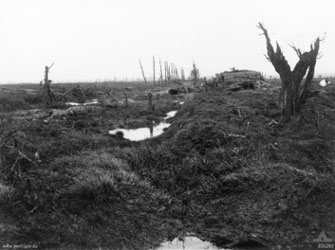
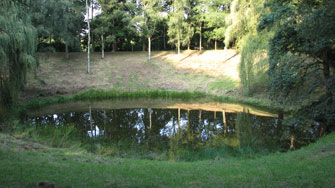
Mine crater
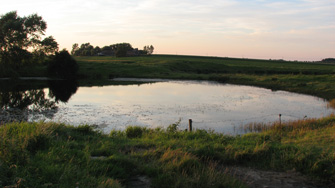
This crater was created by one of the mines which the British exploded underneath the German front line at the start of the Battle of Messines.
Shattered German positions south of Messines Ridge
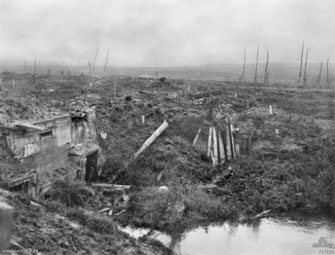
The Australians captured these German positions on the morning of 7 June 1916. German soldiers sheltered from the British artillery in this large, partially buried concrete pillbox. They were trapped in there by the Australians who followed the creeping barrage closely. Australian troops took very few prisoners at Messines because of rumours the Germans had been mistreating captured Australians.
Messines village
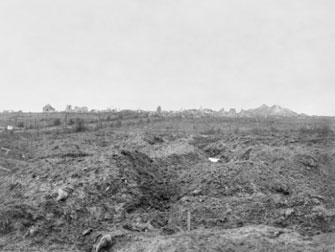
The ruins of Messines village after the battle. New Zealanders advanced up these slopes to capture the village.
Ploegsteert Wood
The Australians marched up to their starting positions through this wood on the night on 6 June 1917. The Germans shelled the wood with gas, wounding a large number of Australians before the attack even began.
Caterpillar Mine Crater
The British attacked in the northern sector. Australian tunnellers blew two mines under the German line at Hill 60 and the Caterpillar. The crater at the Caterpillar was created by 31,500 kilograms of explosive. It was, at the time, the largest man made explosion ever and could be heard in London.
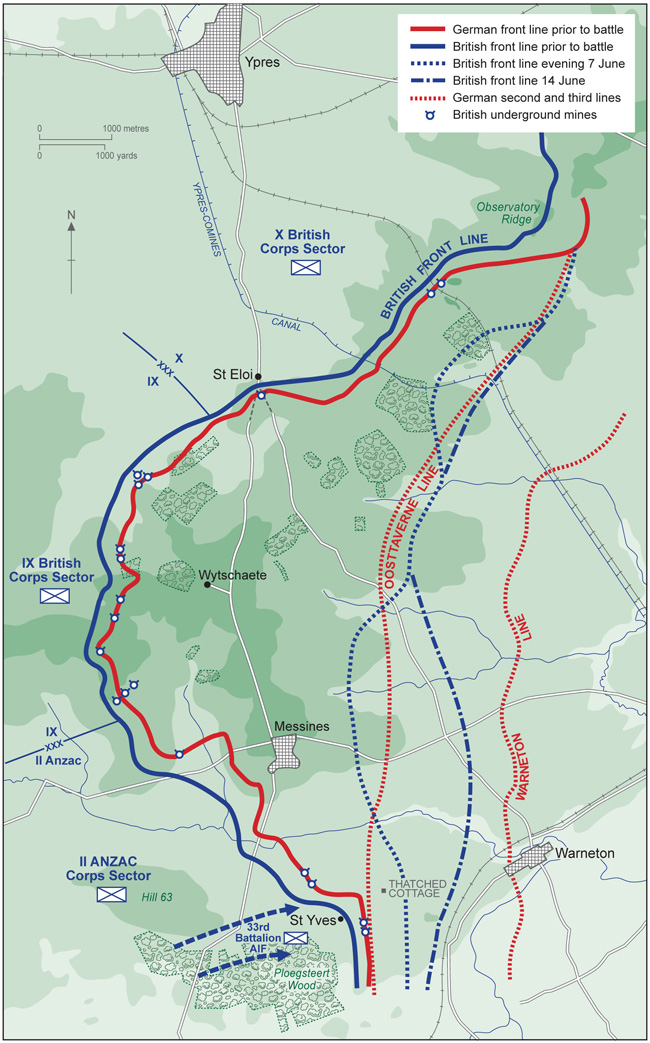
A map of Messines Ridge, the ground that British and Australian troops would successfully capture on 7 June 1917. View larger map
Ask Yourself
- What role do you think the mines might play in the battle?
- Why did battles like this need such strict timetables?
- How much did geography determine the history of the First World War?
- What was unique about the Western Front that made even successes so costly for attacking armies?